Pages

Thursday, 13 September 2012

Blackjack/Casino Themed Cake

3 Comments


As a part of a joint friends 21st birthday celebration I was asked to make a cake. There were a few requirements for the cake:

1. Since it was 2 peoples birthday, it had to look/be 2 cakes.
2. It had to have the birthday theme which was casino.
3. Feed about 100 people.


After some late night Google search sessions, I finally came across a concept that was perfect for the occasion...Blackjack. I am not sure if people understood the cake, but it was Blackjack (since it was a casino themed) and when you get Blackjack it equals 21, which is how old they were turning. Inspiration came from: http://showusyourcakes.com/cakes/blackjack


For the cake, I used the Thunder Cake Recipe. I had to make two cakes, so the recipe was doubled/made twice (since I only had one cake pan, I could only bake one cake at a time). I used a rectangular cake pan that was larger than an a4 sized piece of paper (sorry but I don't know the exact specifications).

The ganache for the cake was 600ml cream with 600g chocolate (200g dark, 400g milk). I made the cake in the morning, of the day before the cake needed to be ready. So before any cutting or assembling was done, it had been refrigerated for about 6 hours.


Assembly
Stage one: Preparing


1. To make sure the cakes worked out, I scanned two playing cards (Jack and Ace) and enlarged them on a4 paper. I used them as my templates to how I wanted the cakes to be shaped, and for the outline of the cake.


2. The cakes were cut to shape. I put a little bit of ganache on the board before placing the cakes on, so that the cakes would be stable.


3. After getting the correct shape, I placed a crumb coat of ganache on the cake. Refrigerated for 2 hours.


4. Final coat of ganache, and then I evened out the cake and smoothed out the edges.


Stage Two: Decorating


The decorating of the cake was done on the morning of the birthday (since the party was hosted at night). I used the following products (most were purchased from Glasshouse Cakes):

  • Black buttercream icing tube (CK decorating icing 113g)
  • Yellow buttercream icing tube (CK decorating icing 113g)
    • To use the buttercream you will need an icing tip, I used one at home, but the lines were quite thick, so if you want thinner lines buy a smaller tip.
  • Red writing icing tube (from Woolworths)
  • White vanilla flavoured fondant
  • 18" square cake board and board


1. I traced the same two card print outs onto grease proof paper, and then traced those on to white fondant that I had rolled out, cut to a4 size and left to set (in a dry cool place away from any light).


2. To trace the image onto fondant, I used a blunt pencil so I didn't get any lead on the cake, but still had noticeable indents along the cake so I knew where I was decorating.


3. Using the black buttercream I started with the Ace of spades and traced along my lines made. Set aside.


4. Using the black buttercream again, I outlined the jack, and the patterned lines. I accidentally drew the line to far at the top, so to fix that I cut out that part of the fondant and flipped it over, and put it back together.


5. Using the red and yellow, I began to fill in the blanks of my outlines with the colours.


6. I carefully placed the ready made images onto the cake, and using the black buttercream, I outlined the outside of the cards.


7. For some final touches, I used white fondant to make out the birthday message. I stuck them on the board with some water. The box was then packed and ready to go.
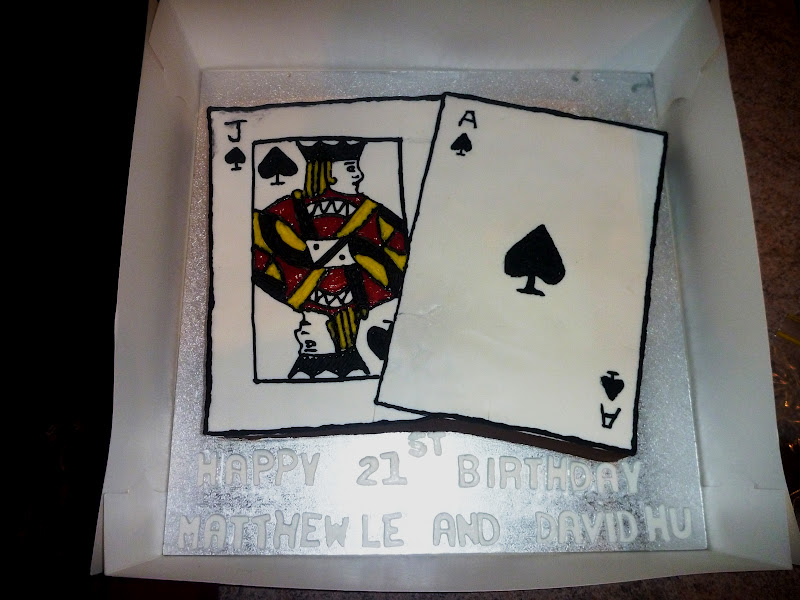
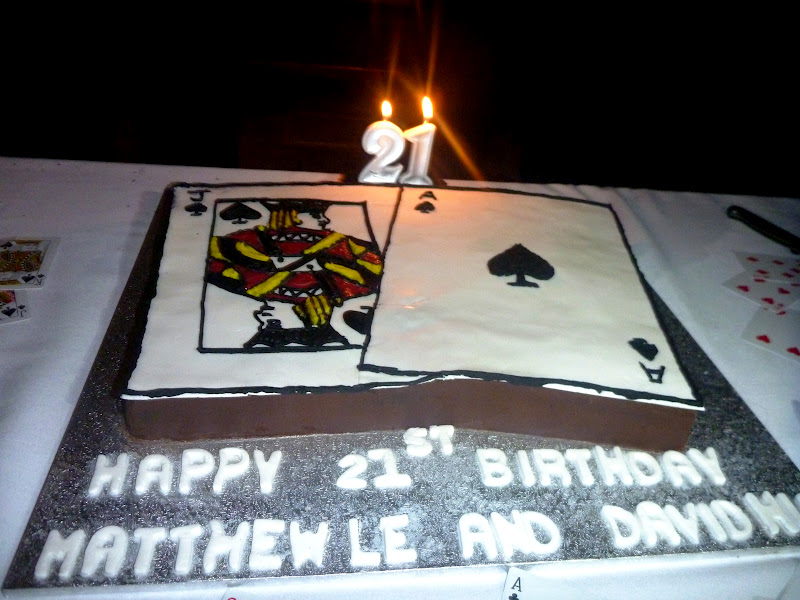


The whole entire cake was finished on the night, with some people not being able to have a slice. The overall feedback on the cake was great, and it was definitely fun to make with only a few mishaps that definitely won't happen next time.

Good food, good times!

Vanilla brulee tarts with strawberry purée

1 Comments


A crazy amount of 21st birthdays have been approaching, and along with gifts, I like providing some sweet delights. In this case, I decided to make some tarts (I got a bit bored of making cakes). I have always wanted to make tarts, and I finally got around to it.

This recipe is by the famous Bourke St Bakery. Unfortunately, mine didn't taste as good, but I never expected them to. Furthermore, due to some time restrictions and not the greatest blow torch, I couldn't quite get the burnt sugar effect on top.

Also, lucky for me, my sister had a whole bunch of pastry left over from a previous tart she made so I didn't have to make the shortcrust pastry. But the recipe she used was   a Matt Moran, sweet shortcrust pastry as seen on MasterChef Australia: http://www.masterchef.com.au/recipes/sweet-shortcrust-pastry.htm


Vanilla brulee tarts with strawberry puree

Makes 20 (8cm tart)
**I used a large round tart pan (~23-25cm) and 5 small tart cases (8cm)


Ingredients

Vanilla Custard
720 ml of thickened cream
1 vanilla bean (or equivalent = 1 teaspoon vanilla bean paste)
10 egg yolks

80g (1/3 cup) caster sugar

Strawberry Puree

250g strawberries, washed and hulled
120g caster sugar


Method:
Vanilla Custard
1. In a saucepan combine vanilla into the cream.

2. Bring to the boil over high heat, as soon as it boils remove from the heat and set aside for 10 minutes.

3. Place egg yolks in a large stainless steel bowl. Add the sugar to the egg yolks and whisk until the sugar has dissolved.

 4. Pour the slightly cooled cream through a sieve over the egg yolks (discarding the vanilla bean pod - if used, and further removing any lumps.)

5. Whisk the mixture to combine.
6. Put the stainless bowl over a saucepan of simmering water, making sure the base of the bowl doesn't touch the water.

7. Continue stirring the mixture with a whisk for 10-15 minutes, or until smooth and thick - continually scrape sides of bowl with rubber spatula.
**NOTE: Do not stop mixing or the mixture will curdle (i.e. the eggs begin to cook).

8. Remove the bowl from the heat and whisk briskly for about 2 minutes to cool the mixture.
9. Once the mixture is off the heart, whisk the mixture every 10 minutes for 1 hour.

10. Place plastic wrap on top of the mixture and refrigerate over night.

Strawberry puree

1. Combine strawberries and sugar into a food processor (blender and hand stick blender will do the same job) until smooth.
2.  Wrap and refrigerate until needed. 

Pastry
1. Roll out the pastry until about 3mm thick. (using flour to prevent sticking)

2. Using the rolling pin, place the pastry into the case and pinch in the sides. Cutting off any excess pastry.
3. Refrigerate for 20-30 minutes.
4. Preheat oven at 190 degrees Celsius.

5. Place greaseproof paper over the top of the tarts, and fill with weighing beads (or uncooked rice)


6. Bake for 15 minutes.

7. Remove greaseproof paper and beads, and bake for another 10 minutes or until light brown.

8. Remove from oven and allow to completely cool before filling.


Assembly

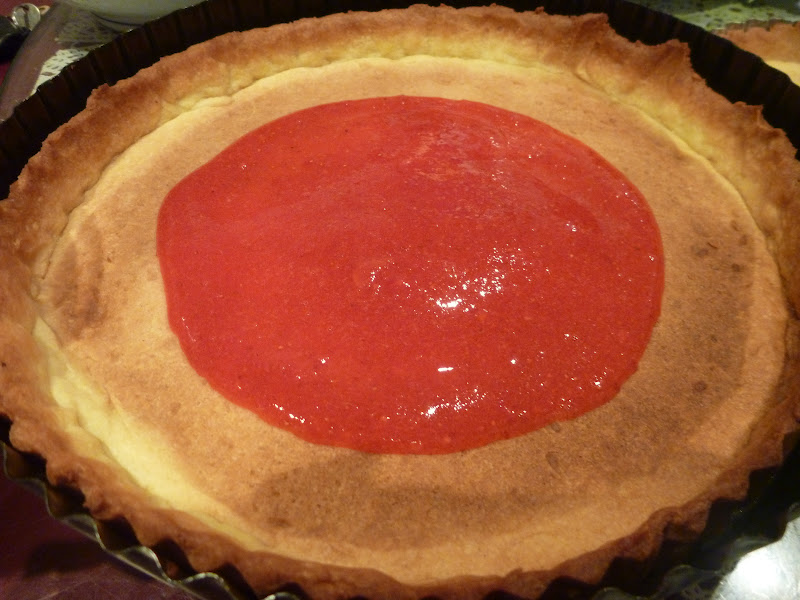
1. Spoon about 3/4 teaspoon of strawberry purée into the base of the tart shell (that is for the 8cm cases, for the big tart I probably put equivalent to a few tablespoons).

2. Pipe the custard into the tart shells (this is so the strawberry purée stays in the centre). **NOTE: I just spooned the custard around the strawberry purée and put a dollop at the top, this works as well as long as your are gentle.

3. Smooth the top of the tart.

4. Refrigerate for 4 hours.

5. Sprinkle a teaspoon of caster sugar on top of the custard and burn with a blow torch until caramelised. (This step doesn't have to be done, but to get the full effect it is advised.)


Going on with the time restrictions, the custard in the big tart case didn't set as well as the custard in the small tart cases, but regardless, it was still tasty.


Good food, good times!